
How to Deep Clean Your Home Like a Professional: The Definitive Step-by-Step Blueprint
In this guide
- The Science of Deep Cleaning: The TACT Principle
- The Professional Equipment Arsenal
- Phase 1: The Pre-Clean Decontamination and Staging Protocol
- Phase 2: Surgical Deep Cleaning (Room-by-Room Execution)
- Phase 3: Windows, Tracks, and Architectural Glass
- Phase 4: High-Performance Floor Care (The Final Step)
- 7 Costly Mistakes Amateur Cleaners Make
- Deep Cleaning vs. Regular Cleaning: The Operational Matrix
- DIY vs. Professional Services: Evaluating the Investment
- Frequently Asked Questions (FAQs)
There is a vast, unmistakable chasm between routine surface housekeeping and a genuine professional deep clean. A routine clean handles surface optics—sweeping visible dust, wiping breadcrumbs off the kitchen island, and making beds. A deep clean, however, is a methodical, restorative intervention. It hunts down hidden microbial reservoirs, eliminates baked-on carbon and polymerized grease, extracts millions of biological allergens trapped in fibrous upholstery, and remediates limescale and grout mold that standard sprays fail to penetrate.
When professional cleaning technicians enter a residence, they do not approach the task with randomized enthusiasm. They rely on the science of cleaning chemistry, industrial workflow patterns, specialized tools, and precise sequencing. Without a systematic approach, an amateur often ends up re-contaminating surfaces they just wiped, spreading dirty mop water across porous tiles, and wasting valuable hours scrubbing stains that chemical dwell time could have dissolved effortlessly.
Whether you are prepping your home for a major family event, recovering from post-renovation dust, or conducting an overdue seasonal overhaul, this comprehensive manual reveals the exact commercial processes, chemical safety protocols, and room-by-room workflows used by the industry’s best cleaners.
Save Time With Trusted Cleaning Professionals
Short on time or facing stubborn grease and limescale that requires commercial equipment? You can bypass the physical strain and reserve vetted, background-checked specialists through Kaamkaar, Pakistan’s leading platform for on-demand home maintenance. Explore their comprehensive home and office cleaning services to have trained technicians restore your space while you relax.
The Science of Deep Cleaning: The TACT Principle
Before lifting a brush, understand the foundational law of professional surface restoration: Dr. Herbert Sinner’s Cleaning Circle (TACT). Every cleaning operation consists of four interdependent parameters:
- T – Temperature: Heat accelerates chemical reactions. Using hot water (50°C–60°C) softens hardened lipids and animal fats in the kitchen, cutting grease-dissolving time in half.
- A – Agitation (Mechanical Action): Scrubbing, wiping, or pressure application. Agitation physically dislodges soil from the substrate. However, relying purely on agitation scratches delicate surfaces; the goal is to let chemistry do the heavy lifting.
- C – Chemical Action: Selecting the correct chemical formulation for the specific soil type.
- T – Time (Dwell Time): The duration a chemical solution sits actively wet on a surface. Disinfectants, descalers, and enzyme cleaners do not work instantaneously. They require between 5 to 10 minutes of active contact time to rupture bacterial cell walls or break chemical bonds.
If you reduce one parameter (such as using cold water or zero dwell time), you must drastically increase another (such as vigorous manual scrubbing) to compensate. Professionals maximize Chemical Action and Time to minimize manual Agitation, protecting surfaces from premature wear and tear.
Demystifying the pH Scale for Home Cleaners
Using the wrong chemical on a surface does more than fail to clean it; it can cause permanent etching, clouding, or discoloration. The basic rule of commercial cleaning chemistry is: opposites neutralize and dissolve.
- Acidic Cleaners (pH 0 to 6): Dissolve inorganic, mineral-based soils. Use these for limescale, calcium buildup, hard water spots, rust rings, and soap scum in shower stalls. Caution: Never apply acids to natural calciferous stone such as marble, limestone, or travertine, as it causes irreversible chemical etching.
- Neutral Cleaners (pH 7): Safe for all water-washable substrates, including sealed hardwood, engineered flooring, slate, and delicate polished surfaces. Ideal for daily maintenance and dust suspension.
- Alkaline Cleaners & Degreasers (pH 8 to 14): Break down organic, fatty, and proteinaceous soils. Highly alkaline cleaners (pH 11–13) saponify cooking oils, converting fats into soap-like substances that rinse away freely with warm water. Used extensively in kitchen ovens, range hoods, and greasy tile splashbacks.
The Professional Equipment Arsenal
Commercial cleaners rarely use supermarket sponge mops or feather dusters. Feather dusters merely fling particulate matter into the ambient air, where it remains suspended for hours before settling back down. Upgrade your toolkit with these commercial standards:
1. Split-Fiber Microfiber (Color-Coded Protocol)
High-grade microfiber features strands split down to 1/16th the diameter of a human hair. These micro-hooks grab dust particles, bacteria, and oils via capillary action and static electricity rather than pushing them around. Adopt the hospital-grade four-color hygiene protocol to eliminate cross-contamination:
- Red/Pink: High-risk biological areas only (toilet bowls, urinals, sanitary bins).
- Yellow: Secondary bathroom surfaces (sinks, shower glass, bathroom tile, mirrors).
- Blue: Low-risk general areas (living rooms, bedrooms, wooden furniture, window glass).
- Green: Kitchen and food-preparation zones (countertops, appliances, dining tables).
2. High-Efficiency Particulate Air (HEPA) Filtration Vacuums
Standard household vacuums often expel sub-micron particles through their exhaust, contaminating your indoor air. A sealed system equipped with a true HEPA filter guarantees the capture of 99.97% of particulate matter down to 0.3 microns, in accordance with the standards outlined by the U.S. Environmental Protection Agency (EPA). This keeps trapped pollen, dander, and dust-mite feces locked inside the machine.
3. Specialist Detailing Implements
- Stiff Nylon Grout Brushes: Angled bristles configured to scour grout recesses without chewing away sealant.
- Plastic Razors and Putty Knives: Safe scraping implements that lift dried paint splatters, wax, and baked grease off flat surfaces without scratching glass or porcelain.
- Commercial Brass or Stainless Steel Squeegees: Precision-cut rubber blades for streak-free windows and showers.
- Telescopic Microfiber Wand: Reaches 12–14 feet to safely dust cathedral ceilings, chandeliers, and high AC split units without precarious ladder work.
Phase 1: The Pre-Clean Decontamination and Staging Protocol
Before introducing water or chemicals into a space, the environment must undergo systematic staging. Professional crews never clean around clutter; clutter traps grime and consumes 40% of physical movement efficiency.

The 3-Bin Blitz Method
Equip yourself with three large plastic tubs labeled:
- Relocate: Items that belong in a different room (books, toys, electronics).
- Donate / Discard: Expired toiletries, unwanted packaging, stale pantry goods.
- Wash / Launder: Soft fabrics, cushion covers, bed linens, shower curtains, and throw rugs.
Strip all beds, remove bathroom fabric curtains, and pull throw rugs out to an exterior patio or balcony for UV airing and mechanical beating. Clear countertops down to bare stone or laminate. The more horizontal surface area you expose, the faster and more thoroughly you can clean.
Phase 2: Surgical Deep Cleaning (Room-by-Room Execution)
1. The Kitchen: Commercial Degreasing and Appliance Sanitization
The kitchen is an organic battlefield of lipids, proteins, and sticky carbohydrates. Follow this order of operations to clean it efficiently:

A. Range Hood and Extraction Baffles
The extraction system is usually the most neglected kitchen fixture. Remove the metal mesh or baffle filters. Submerge them in a sink basin filled with boiling water, 1 cup of sodium bicarbonate (baking soda), and 1/4 cup of concentrated grease-cutting dish detergent. Allow to soak for 30 minutes. The effervescent alkaline reaction will dissolve the solidified amber oil. Rinse thoroughly with hot water and let them air dry.
B. The Oven and Cooktop Core
Remove oven racks and soak them in warm soapy water. Apply an alkaline oven cleaner or a non-toxic paste of baking soda, water, and washing soda to the internal enamel surfaces, avoiding the heating elements and fan cover. Let the solution dwell for at least 45 to 60 minutes. While it dwells, attend to the gas burners or ceramic cooktop, breaking down burnt rings using a plastic scraper held at a 30-degree angle to protect the enamel finish.
C. Cabinetry Top Surfaces and Exterior Facings
Warm air rises, carrying microscopic oil vapor that settles onto the flat tops of upper cabinetry, bonding with floating dust into a sticky layer. Spray a heavy-duty degreaser onto these tops, let it sit for 5 minutes to soften the layer, and scrape the sludge away into a disposable paper towel before doing a final pass with a damp microfiber cloth.
D. Refrigerator Mechanicals and Sanitization
Unplug the refrigerator. Pull the appliance forward gently. Vacuum the lower rear condenser coils with a soft brush attachment; caked dust on coils reduces thermal exchange, forcing the compressor to run hotter and consuming up to 30% more electricity. Inside, discard expired contents, remove shelves, wash them with warm water and mild dish soap, and wipe down interior liner walls with an EPA-registered food-contact sanitizer.
E. Drain Remediation
Pour half a cup of baking soda directly down the sink waste disposal and drain, followed by one cup of hot white vinegar. Let the mixture froth for 10 minutes to loosen decaying food matter lining the P-trap. Flush the system with a full kettle of boiling water to wash away residual fats.
2. Bathrooms: Mineral Scale, Grout Extraction, and Bio-Disinfection
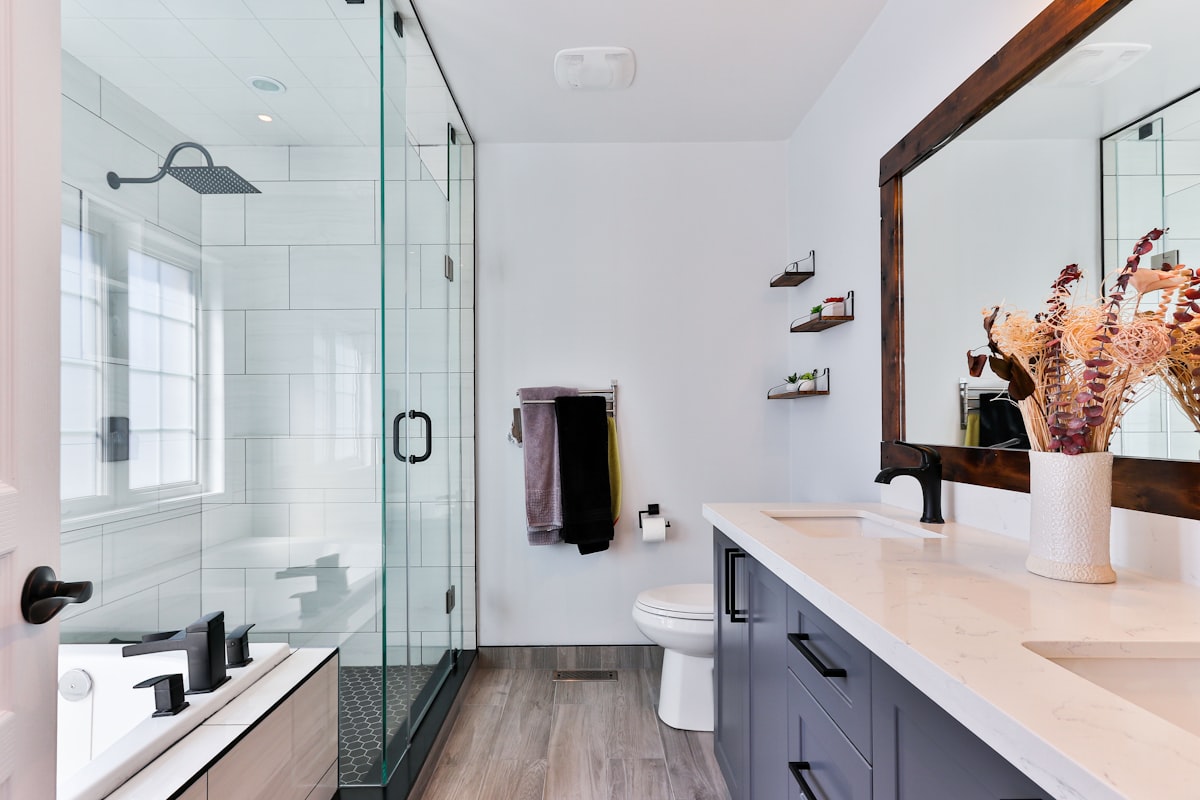
Bathrooms are high-humidity zones susceptible to calcium carbonate scale, magnesium soap deposits, and fungal spores (like Aspergillus niger). Bathrooms require a strict dry-to-wet operational sequence.
A. Dry Dusting the Bathroom
Never apply water to a bathroom before dry dusting. Use an electro-static duster or a vacuum with a horsehair brush to capture hair, lint, and dry skin particles from baseboards, toilet cisterns, vanity surfaces, and exhaust fan grilles. Introducing liquids to loose hair creates a clinging film that takes three times longer to remove.
B. The Exhaust Fan Cleaning
A choked exhaust fan traps moisture inside the room, causing black mold to flourish. Unclip the plastic fascia cover and submerge it in warm soapy water. Use a vacuum crevice tool to pull out dust packed around the motor housing and impeller blades. Spray a light mist of isopropyl alcohol onto the fan blades and wipe clean before snapping the dry cover back on.
C. Restoring Shower Glass and Tile Walls
Soap scum is not just dried soap; it is an insoluble ionic compound formed when the fatty acids in soap bind with calcium and magnesium ions in hard water. To break this bond:
- Apply an acidic cleaning solution (pH 2–3) evenly across shower glass and ceramic wall tiles.
- Allow an 8-minute dwell time, keeping the surface wet by misting lightly if it begins to evaporate.
- Agitate stubborn water-spot scale with a non-scratch synthetic scrub sponge (white scouring pad).
- Rinse the surfaces completely with warm water from the shower wand.
- Use a commercial rubber squeegee to remove all remaining water droplets, wiping the blade dry with a yellow microfiber towel between each stroke.
D. Grout Line Deep Cleansing
Tile grout is porous cement that absorbs contaminated dirty water like a sponge. Treat stained grout lines with an oxygen bleach or hydrogen peroxide-based paste. Avoid chlorine bleach on colored grout, as it causes fading and weakens the grout structure over time. Agitate the lines with a dedicated narrow grout brush using linear strokes, then wipe away lifted soil with an absorbent microfiber cloth.
E. The Toilet: 360-Degree Sanitization
Flush the toilet, then force excess water down the trap using the toilet brush head to expose the waterline scale. Apply a thick toilet bowl cleaner under the rim and down the throat. While that sits, spray an EPA-approved disinfectant across the entire exterior assembly: handle, lid, hinges, porcelain base, and the floor surrounding the fixture. According to the CDC Guidelines for Environmental Cleaning, disinfectants must remain visibly wet on non-porous surfaces for their full indicated contact time (often up to 10 minutes) to destroy pathogens like Norovirus and Staphylococcus. Wipe clean with single-use red microfiber towels.
3. Living Areas, Dining Rooms, and Corridors
Living spaces accumulate airborne particulates, street dust, dead skin cells, and pet dander. The goal here is systematic particulate extraction.
A. High Architectural Features and Ceiling Fans
Start at the highest point of the room. Use an extendable microfiber duster to clear crown molding, ceiling corners, chandeliers, and smoke detector covers. For ceiling fan blades, slide a damp microfiber pillowcase over each blade one by one; pulling the fabric toward you traps the built-up dust inside the pouch rather than letting it rain down onto the carpets and furniture below.
B. Curtains, Drapes, and Window Blinds
Curtains function as massive air filters, absorbing dust and odors. Vacuum them top-to-bottom using an upholstery brush attachment set to low suction. If dealing with horizontal slat blinds, put on a pair of cotton gloves, spray the fingertips with an anti-static duster spray, and run your fingers along both sides of each slat simultaneously to pull away dust in single passes.
C. Upholstery Decontamination
Remove all cushions. Vacuum the inner recesses of sofas and armchairs using a crevice tool to pull out crumbs, pet fur, and grit that can grind down fabric fibers. Sprinkle baking soda mixed with a few drops of natural essential oil lightly across the fabric, let it sit for 45 minutes to absorb embedded odors, and vacuum thoroughly using a clean brush attachment.
D. Architectural Detailing (Doors, Frames, Baseboards)
Dampen a blue microfiber cloth with a neutral pH cleaner. Wipe down:
- The top horizontal ledge of all interior doors (a notorious dust collector).
- Door handle plates, which should be disinfected to kill cold and flu viruses.
- Light switch covers and wall outlet plates.
- Baseboards throughout the perimeter of the room, using an angled sponge mop or wiping by hand.
4. Bedrooms: Dust Mites and Air Quality Optimization
We spend roughly one-third of our lives in the bedroom, shedding millions of skin cells that support dust-mite populations. A bedroom deep clean is an investment in your respiratory health.
A. Mattress Sanitization Procedure
Once you strip the mattress protector and sheets, inspect the mattress surface. Vacuum the entire mattress slowly with a clean, dedicated upholstery tool, spending extra time along quilted seams and buttons where dust mites congregate. Treat organic spots (sweat, spills) with an enzymatic cleaner, misting lightly so you do not saturate the inner foam or spring padding. Let the mattress air out completely in natural sunlight or near an open window.
B. Deep Cleaning Wardrobes and Closets
Empty the closet floors. Vacuum corners and baseboards, then wipe down wardrobe shelving with a lightly dampened microfiber cloth. Place natural cedar blocks or dried lavender bags inside to repel fabric moths and keep enclosed air smelling fresh.
C. Under-Bed Extraction
Move the bed frame out of position. The space beneath beds gathers heavy layers of dust, fibers, and hair. Vacuum the sub-floor thoroughly, damp mop the surface with a neutral cleaner, and ensure the floor is completely dry before sliding the furniture back into place.
Phase 3: Windows, Tracks, and Architectural Glass
Standard household glass cleaner and paper towels often leave a streaky film of detergent residue that attracts more dirt. Professional window cleaning is straightforward and relies on clean water and a squeegee.
The Professional Window Track Cleaning Method
- Vacuum the dry, loose soil from the tracks using a narrow crevice adapter.
- Sprinkle a light dusting of sodium bicarbonate along the remaining grime in the track.
- Spray white vinegar over the baking soda to initiate a bubbling reaction that lifts stubborn, caked-on dirt.
- Let it foam for 5 minutes, then scrub along the channel using an old toothbrush or a track detailing tool.
- Press a paper towel or rag into the corner of the track to soak up the dirty liquid, leaving a smooth, clean runner.
Streak-Free Glass Restoration
Fill a dedicated window washing bucket with warm water and 2 to 3 drops of concentrated dishwashing detergent (excess soap creates streaks). Wash the glass using a microfiber applicator wand to loosen the dirt film. Place your squeegee blade at the top-left corner of the pane, pull it down smoothly in overlapping vertical strokes (or use the serpentine “S-technique”), and wipe the rubber blade dry with a lint-free cloth after every stroke. Finally, dry the outer edges with a waffle-weave microfiber towel.
Phase 4: High-Performance Floor Care (The Final Step)
Floors should always be the last step of a deep clean. Cleaning floors earlier is wasted effort, as dust and debris from ceilings, baseboards, and counters will fall onto them throughout the process.

The Two-Bucket Mopping Protocol
The standard single-bucket mop method dips a dirty mop back into clean cleaning solution, spreading soiled water over the floor. The professional Two-Bucket System prevents this:
- Bucket 1: Fresh water mixed with the proper dilution of pH-appropriate floor cleaner.
- Bucket 2: Clean rinse water fitted with a wringer.
The Execution: Dip your microfiber flat mop into Bucket 1, mop a 10×10 foot section, and then plunge the mop into Bucket 2 to wring out the dirty water. Only return the clean, wrung mop to Bucket 1 for more cleaning solution. This simple process keeps your rinse water clear and prevents gray, cloudy residue from drying on your tile or stone.
Flooring-Specific Maintenance Rules
- Hardwood and Laminate: Never soak the floor. Excessive moisture seeps into the seams, causing boards to swell, warp, and delaminate. Use a barely damp microfiber pad with a neutral-pH wood cleaner.
- Polished Marble and Granite: Avoid acidic cleaners, ammonia, and vinegar entirely. Use a pH-neutral stone cleaner. After mopping, buff the surface dry with a clean microfiber pad to prevent water spots and reveal the stone’s natural sheen.
- Glazed Ceramic and Porcelain Tile: Clean with a mild alkaline solution to remove light surface grease. Scrub tile grout periodically with a dedicated grout brush to lift embedded soil.
7 Costly Mistakes Amateur Cleaners Make
Avoid these common pitfalls that cost time, damage surfaces, and introduce safety hazards:
- Dangerous Chemical Mixing (Bleach + Ammonia/Acids): Never combine chlorine bleach with ammonia or acidic cleaners (like vinegar or descalers). The reaction releases toxic chloramine or chlorine gas, causing severe respiratory distress. Review chemical safety standards from the Occupational Safety and Health Administration (OSHA) for proper chemical handling protocols.
- Using Vinegar on Natural Stone: Vinegar is acidic (acetic acid). Spraying it on marble, limestone, or travertine etches the calciferous stone instantly, leaving behind cloudy, rough patches that require expensive mechanical diamond polishing to repair.
- Scrubbing Stains Outward: When treating carpet or upholstery stains, scrubbing vigorously outward spreads the stain into the surrounding fibers. Always blot firmly from the outside edge toward the center of the stain.
- Skipping the Dry Dusting Phase: Applying wet cleaning solutions directly onto dusty baseboards, fan blades, or blinds creates a muddy paste that is frustrating to clean and streaks surfaces.
- Using Soiled Cleaning Cloths: Reusing the same cleaning rag across multiple surfaces spreads grime and bacteria from one room to another. Swap to a fresh, clean fold of your microfiber towel as soon as it becomes soiled.
- Neglecting Cleaning Equipment: A vacuum with a full canister or a mop head saturated with old floor residue cannot clean effectively. Empty filters, wash mop heads in hot water, and sanitize brushes after every deep clean.
- Ignoring Product Dwell Times: Spraying a disinfectant and immediately wiping it away leaves surface bacteria alive. Let products sit for their full recommended contact time before wiping.
Deep Cleaning vs. Regular Cleaning: The Operational Matrix
| Cleaning Parameter | Standard Routine Cleaning | Professional Deep Cleaning |
|---|---|---|
| Primary Objective | Surface maintenance, tidying, light sanitization | Restoration, allergen eradication, scale/grease breakdown |
| Kitchen Scope | Wipe countertops, sink wash, exterior stovetop wipe | Oven interior, range hood degreasing, behind fridge, cabinet tops |
| Bathroom Scope | Toilet bowl swish, mirror wipe, quick floor mop | Grout remediation, descaling shower glass, exhaust fan motor |
| Living & Bedroom | Make beds, dust visible surfaces, vacuum high-traffic paths | Under/behind heavy furniture, mattress sanitization, baseboards, vents |
| Recommended Frequency | Weekly or bi-weekly | Every 3 to 4 months (or seasonally) |
DIY vs. Professional Services: Evaluating the Investment
A thorough DIY deep clean of an average 2,000-square-foot home typically takes between 16 to 24 hours of sustained physical labor. This demands significant stamina, several dedicated weekends, and an investment in commercial-grade squeegees, microfiber towels, chemical degreasers, and safety equipment.
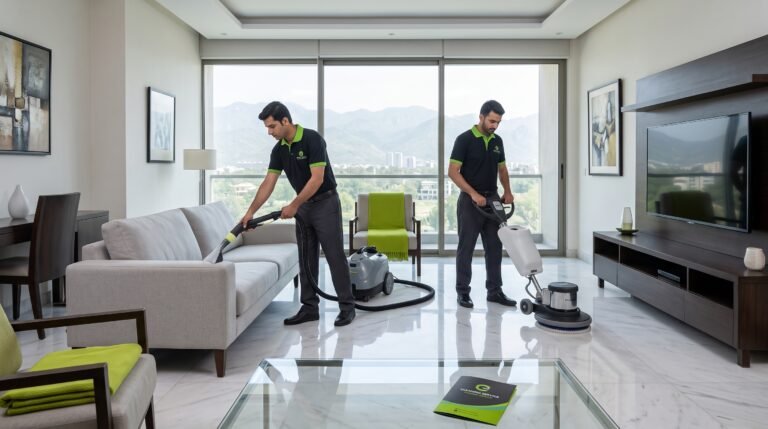
For busy homeowners, professionals offer a sensible alternative. Commercial crews arrive with specialized tools—such as high-pressure steam extractors, heavy-duty floor scrubbers, and industrial HEPA vacuums—and work through structured checklists to complete the job in a fraction of the time.
Transform Your Living Space with Kaamkaar
If you prefer to spend your weekend relaxing rather than scrubbing tile grout and degreasing range hoods, let the certified cleaning specialists at Kaamkaar handle the hard work. With our motto “Har Kaam, Ek Call Par”, trusted home solutions are always within reach.
Whether you require a seasonal deep refresh, post-renovation cleanup, or move-in/move-out sanitation, check out our verified Home and Office Cleaning Services to book trained, vetted professionals equipped with industrial tools today.
Frequently Asked Questions (FAQs)
How many hours does a complete home deep clean typically take?
For a standard 3-bedroom, 2-bathroom home, a solo homeowner doing an authentic deep clean should expect the process to take roughly 12 to 18 hours, often split over two full days. In contrast, a trained professional team of two or three cleaners from Kaamkaar can usually complete the entire deep clean within 4 to 6 hours using concurrent, room-by-room workflows.
Can I deep clean my home room-by-room over several days?
Yes. Tackling one room per day is often the best DIY approach to avoid fatigue. If you break the job into stages, follow this order: start with the kitchen (the most labor-intensive), move on to the bathrooms, clean the bedrooms next, tackle the living and dining areas, and finish with hallways, entryways, and floor finishing.
What should I do with my pets during a deep cleaning session?
Pets should be kept in a secure room, out in the yard, or boarded during deep cleaning. High-traffic cleaning involves opened doors, loud vacuum equipment, and potent active cleaning agents (like descalers and degreasers) that can irritate sensitive paws and respiratory systems. Keeping pets in a safe area protects both their safety and your newly cleaned surfaces.
What is the difference between sanitizing and disinfecting?
Sanitizing reduces the number of bacteria on a surface to safe public health levels (typically a 99.9% reduction), usually within 30 to 60 seconds. Disinfecting uses specific chemical formulations to destroy nearly all targeted pathogens, including hardy viruses and fungi. Disinfectants require a longer dwell time (typically 5 to 10 minutes of active wet contact) to work effectively.
How often should a home undergo an exhaustive deep clean?
Most homes require a deep clean every 3 to 4 months (roughly once per season). However, high-traffic homes with pets, small children, or residents with dust allergies often benefit from deep cleaning every 6 to 8 weeks, especially in grease-heavy kitchens and moisture-prone bathrooms.